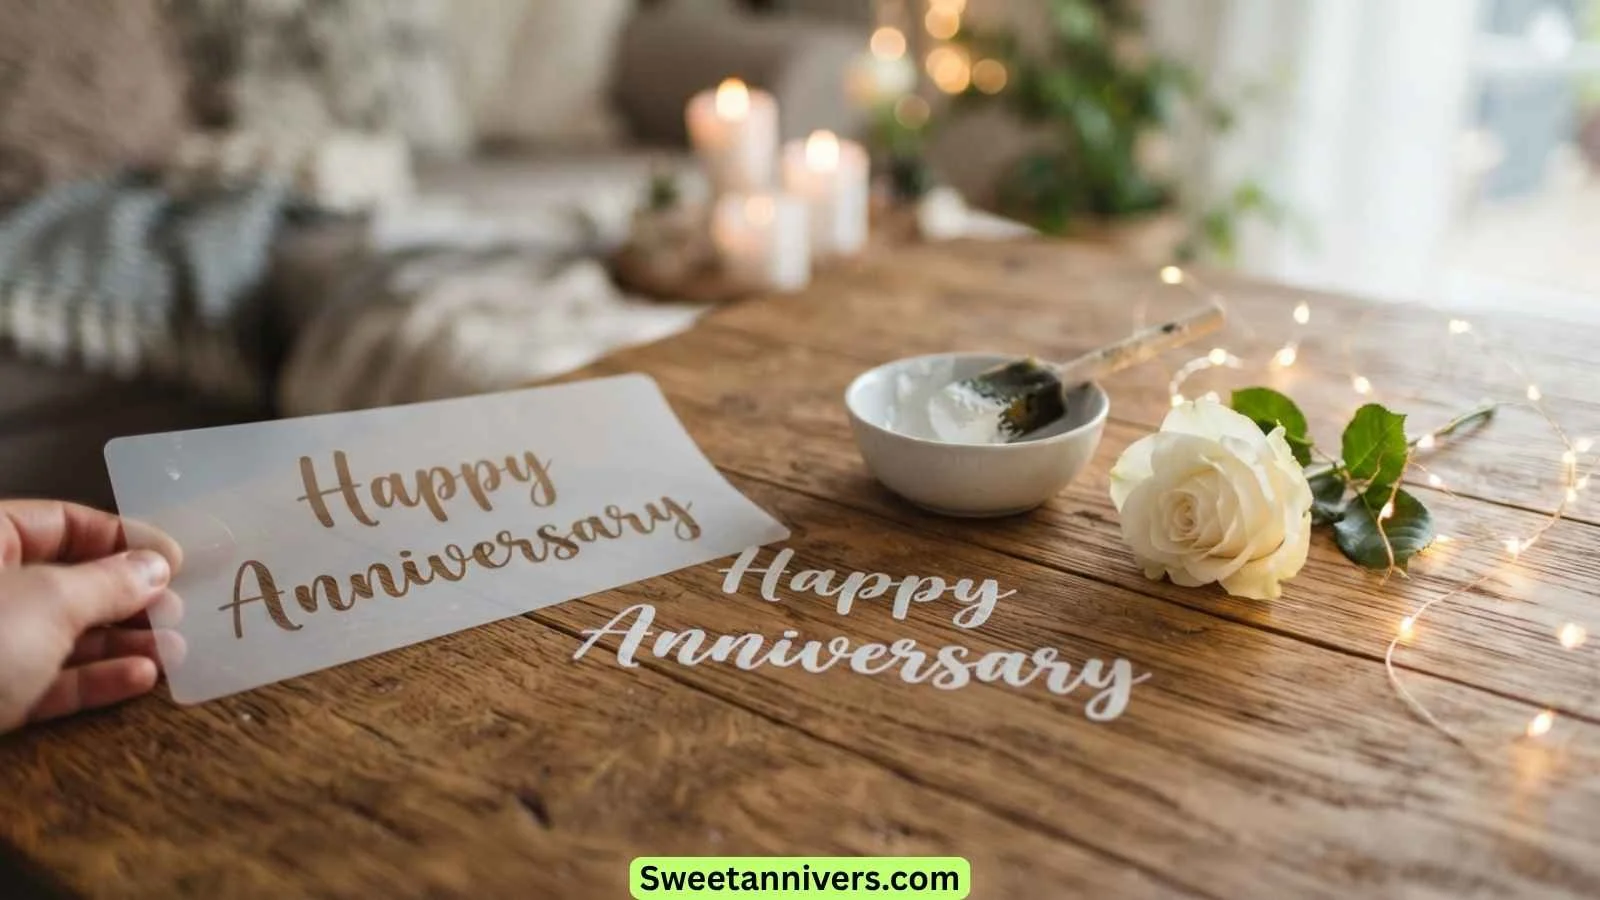
A happy anniversary stencil makes it easy to create a beautiful sign, card, gift, or decoration. You can print a stencil, cut it by hand, or use a Cricut machine to make a clean design.
Stencils are useful because you do not need strong drawing skills. You only need a good design, the right material, and a little paint or cutting practice.
You can make a simple Happy Anniversary sign for your spouse. You can also create a personalized design for parents, grandparents, friends, or another special couple.
The design can include names, a wedding date, an anniversary number, hearts, flowers, or a short message. You can make it romantic, funny, rustic, elegant, or modern.
In this guide, you will learn what an anniversary stencil is, which file format to choose, how to make one at home, which fonts and materials work best, and how to use stencils with Cricut and Silhouette machines.
You will also find practical design ideas, size guides, painting tips, and answers to common questions.
What Is a Happy Anniversary Stencil?
A happy anniversary stencil is a reusable or printable design used to transfer anniversary words, letters, numbers, or shapes onto another surface.
Instead of drawing each letter by hand, you place the stencil on your chosen surface. You then paint, spray, or trace through the open areas.
For example, a basic design may simply say:
HAPPY ANNIVERSARY
A more personal stencil could say:
HAPPY ANNIVERSARY
JAMES & EMILY
25 YEARS TOGETHER
You can use anniversary stencils on many surfaces, including:
- Wooden signs
- Cardstock
- Paper
- Canvas
- Gift boxes
- Gift bags
- Scrapbook pages
- Glass
- Fabric
- Party decorations
- Photo backdrops
- Home decor
- Memory boxes
- Anniversary plaques
A stencil can be disposable or reusable. Paper and some vinyl stencils are useful for quick projects. Mylar and other stencil sheets can be washed and used again.
The best option depends on your project, surface, and tools.
Printable Happy Anniversary Stencil Ideas
A printable stencil is often the easiest choice for a simple DIY project.
You can create or download a design, print it on paper, and use it as a cutting or tracing guide. This works especially well when you only need one stencil.
Here are useful printable design ideas:
- Happy Anniversary in bold letters
- Happy Anniversary, My Love
- Happy Anniversary Mom & Dad
- 25 Years of Love
- Forever & Always
- Together Since 2001
- Still in Love
- Our Love Story
- Better Together
- Love Grows Here
- Forever Starts With Us
- Cheers to Another Year
- Still Choosing You
- Happily Ever After
- One Love, One Life
- Our Forever
- Years of Love and Laughter
- Celebrating Our Love
- Together Is Our Favorite Place
- Love Never Fades
Simple printable layout ideas
The words are only one part of a stencil. The layout also matters.
Try a centered design:
HAPPY ANNIVERSARY
♥
JOHN & SARAH
Or use the anniversary number as the main feature:
25
YEARS OF LOVE
2001 – 2026
You can also put the words inside a heart.
A printable stencil is best when the letters are thick and easy to cut. Avoid very thin decorative fonts if you plan to cut the design by hand.
Happy Anniversary Stencil Templates: PDF, PNG, and SVG Explained
If you are searching for an anniversary stencil online, you may see several file types. Each one has a different purpose.
| File Type | Best Use | Beginner Friendly? |
|---|---|---|
| Printing | Yes | |
| PNG | Basic digital use and printing | Yes |
| SVG | Cricut and cutting machines | Yes, after setup |
| JPG | Basic image printing | Yes |
| DXF | Some cutting software | More advanced |
PDF stencil
A PDF is a good choice when you want to print the stencil at home.
It usually keeps the design layout consistent. You can print it on regular paper or cardstock.
PNG stencil
A PNG is an image file. It can work well when you want to resize or edit the design in an image editor.
However, enlarging a small PNG too much can make the edges look blurry.
SVG stencil
An SVG is especially useful for Cricut and other cutting machines.
Because SVG designs are vector-based, they can usually be resized without losing their sharp edges.
If your main goal is a Cricut anniversary stencil, look for an SVG design whenever possible.
Which format should you choose?
Choose PDF if you simply want to print.
Choose SVG if you are using Cricut or another cutting machine.
Choose PNG if you need a simple image for basic editing or printing.
Best Happy Anniversary Stencil Fonts
Font choice can make or break a stencil.
A font may look beautiful on a computer but work poorly as a physical stencil. Thin strokes and complicated letters can be difficult to cut.
For beginners, choose fonts with:
- Thick strokes
- Clear letter shapes
- Good spacing
- Simple curves
- Strong connections
- Easy-to-read words
Good font styles for anniversary stencils
1. Bold block fonts
These are excellent for wooden signs and beginner projects.
2. Simple serif fonts
These give the design a classic and elegant look.
3. Bold script fonts
These can create a romantic appearance when the letters are thick enough.
4. Handwritten fonts
These are useful for cards and small decorations.
5. Minimalist sans-serif fonts
These work well for modern anniversary signs.
What is a stencil font?
A stencil font is designed with small connecting sections called bridges.
These bridges are important because some letters have enclosed areas.
Consider the letter O. If you cut the entire outline, the center could fall out.
A stencil font leaves a small connection between the inside and outside sections.
The same issue can happen with letters such as:
A, B, D, O, P, R, Q, and 0.
If you are creating your own design, make sure enclosed parts stay connected.
This small detail can make your stencil much easier to use.
Happy Anniversary Stencil Ideas for Cricut and Silhouette
Cricut and Silhouette machines are useful when you want clean, detailed stencil designs.
You can create lettering, names, dates, numbers, hearts, flowers, and other shapes without cutting everything by hand.
Here are practical Cricut design ideas:
- Happy Anniversary with two hearts
- Couple’s names with a wedding date
- Large anniversary number
- 25 Years Together
- Forever & Always
- Initials inside a heart
- Floral anniversary lettering
- Wedding-ring design
- Infinity symbol with names
- Together Since 2006
- Our Love Story
- Still in Love
- Cheers to Us
- Love Grows Here
- Happily Ever After
- Minimalist anniversary lettering
- Rustic wood sign lettering
- Circular text around a heart
- Names connected by a heart
- Large number with small anniversary text
Cricut stencil tip
When making a stencil with Cricut, think about the negative space.
The machine cuts the areas that you tell it to cut. The remaining material becomes the stencil.
For reusable projects, use a suitable stencil sheet or reusable stencil material.
For one-time projects, stencil vinyl or another appropriate temporary material may be easier.
Always test your design on a small piece of material first.
This is especially important if your design has small letters or complicated shapes.
Happy Anniversary Stencil Sizes: A Simple Guide
The right stencil size depends on the surface.
A design that looks great on a wall may be far too large for a greeting card.
| Project | Suggested Design Size |
|---|---|
| Greeting card | 2–5 inches wide |
| Gift tag | 1–3 inches wide |
| Small wooden sign | 6–12 inches wide |
| Medium wooden sign | 12–18 inches wide |
| Large wall sign | 18–30+ inches wide |
| Photo backdrop | 24–48+ inches wide |
| Small canvas | 6–10 inches wide |
| Gift box | 3–8 inches wide |
These are starting points rather than strict rules.
Measure your surface before making the stencil.
Leave some empty space around the words. A design that fills every inch of the surface can look crowded.
For a wooden sign, the lettering should usually be large enough to read from a few feet away.
For a card, smaller lettering works because the reader will hold it close.
Romantic Happy Anniversary Stencil Designs
Romantic stencils work well for spouses and couples.
The key is to combine the main words with one or two meaningful details.
Try these layouts:
- Happy Anniversary + two hearts
- Happy Anniversary + couple’s names
- Forever & Always + wedding date
- Still Falling for You + heart
- Two Hearts, One Love
- You & Me + infinity symbol
- Our Love Story + date
- Forever Yours + floral border
- Better Together + linked hearts
- My Forever + couple’s initials
- Love Grows Here + flowers
- Still My Person + heart
- One Love, One Life
- Forever Starts With Us
- Together Is Home
- You Are My Forever
- Love You Always
- Our Best Chapter Yet
- Cheers to Our Love
- Forever Looks Good on Us
A simple romantic layout
Try placing the main message at the top:
HAPPY ANNIVERSARY
Then put a large heart below it.
Under the heart, add:
EMMA & DANIEL
2016 – 2026
This design is simple, personal, and easy to read.
Funny Happy Anniversary Stencil Ideas
An anniversary stencil can also be funny.
Humorous designs work well for friends, siblings, parents, or couples who enjoy playful gifts.
Try:
- Another Year of Putting Up With Me
- We Still Do
- Marriage Level: Expert
- Another Year, Same Team
- Still Stealing Each Other’s Food
- We Survived Another Year
- Love, Laughter & Laundry
- Still My Favorite Weirdo
- Partners in Crime
- Marriage: The Ultimate Team Project
- Still Together Somehow
- Another Year of Shared Passwords
- Officially Still a Team
- Marriage Looks Good on Us
- Cheers to Another Year of Inside Jokes
- Love Is Patient, Marriage Is Funny
- Still Choosing Each Other
For a funny sign, use a bold font rather than a delicate script.
A large, simple message usually makes the joke easier to read.
DIY Happy Anniversary Stencil for Wood Signs
Wooden anniversary signs are popular because they can become keepsakes.
You can make a rustic sign for a spouse, parents, grandparents, or friends.
What you may need
- Clean wooden board
- Anniversary stencil
- Painter’s tape
- Stencil brush or sponge
- Acrylic or suitable surface paint
- Pencil
- Ruler
- Sandpaper
- Sealer, if needed
Step 1: Prepare the wood
Make sure the surface is clean and dry.
If the wood is rough, lightly sand it. Remove loose dust before painting.
Step 2: Plan the layout
Measure the board.
Place your stencil in the center. Check the spacing before securing it.
Step 3: Secure the stencil
Use painter’s tape or another suitable method.
The stencil should not move while you paint.
Step 4: Apply paint
Use only a small amount of paint.
A sponge or stencil brush works well because you can dab the paint instead of brushing it under the edges.
Step 5: Remove the stencil
Lift the stencil slowly.
Do not wait until a thick layer of paint becomes completely hard around the edges.
Step 6: Let it dry
Allow the paint to dry fully.
If needed, clean up tiny imperfections with a fine brush.
Step 7: Seal the sign
If the sign will be handled often or displayed in a place where it may get dirty, use an appropriate protective sealer.
How to Prevent Paint From Bleeding Under a Stencil
Paint bleed is one of the most common problems for beginners.
It happens when paint moves underneath the stencil edges.
Luckily, several simple steps can help.
Use less paint.
Too much paint is one of the biggest causes of bleeding.
Secure the stencil.
A moving stencil can create blurry edges.
Dab instead of brushing.
Use gentle up-and-down movements.
Use a stencil brush.
A short, firm brush gives you better control.
Check the surface.
Rough or uneven surfaces can allow paint to move under the stencil.
Test first.
Try your technique on a scrap piece of wood or cardboard.
For detailed designs, you can also apply a very thin base layer around the stencil before adding the final paint color. This can help seal tiny gaps on some surfaces.
Happy Anniversary Stencil Materials: Which One Is Best?
Different materials work better for different projects.
Paper
Paper is cheap and easy to find.
It is useful for quick projects, tracing, and testing a design.
The downside is that it can become soft or damaged by wet paint.
Cardstock
Cardstock is stronger than regular paper.
It can work well for one-time projects.
However, it may not survive repeated washing or heavy paint use.
Mylar
Mylar is a popular choice for reusable stencils.
It is flexible, durable, and can be cleaned after use.
It is a good option when you plan to make several anniversary projects.
Vinyl
Vinyl can work well for temporary stencil projects.
It can stick closely to a smooth surface, which may help create sharp edges.
It is particularly useful for cutting-machine projects.
Stencil film
Stencil film is another option for reusable or detailed designs.
The right choice depends on your cutting machine, surface, and project requirements.
Happy Anniversary Stencil Ideas for Cards and Gifts
You do not need a large sign to use a stencil.
Small designs can add a handmade touch to gifts.
Try these ideas:
- Stencil Happy Anniversary on a card
- Add names to a gift box
- Put the wedding date on a gift tag
- Add initials to a wooden heart
- Decorate a scrapbook page
- Create a personalized photo frame
- Paint a small keepsake plaque
- Add anniversary numbers to wrapping paper
- Decorate a memory box
- Create a handmade gift bag
- Add a heart to a greeting card
- Paint a small canvas
- Decorate a wooden tray
- Add lettering to a photo mat
- Create a personalized anniversary bookmark
- Decorate a keepsake box
- Add a short message to a candle holder
- Create a framed anniversary design
- Add initials to a wooden ornament
- Make a small anniversary wall plaque
For a small gift, avoid long sentences.
A short phrase such as Forever Us or Happy Anniversary can look much cleaner.
Happy Anniversary Stencil Ideas for Parents and Grandparents
Stencils are also excellent for family anniversary gifts.
Parents and grandparents may appreciate a design that celebrates their years together.
Consider including their names and wedding year.
Here are some ideas:
- Happy Anniversary Mom & Dad
- Celebrating Your Love
- A Lifetime of Love
- Years of Love and Memories
- Together Through Every Season
- Your Love Inspires Us
- Two Hearts, One Story
- Love That Lasts
- Cheers to Your Beautiful Journey
- Celebrating Your Forever
- Still Strong After All These Years
- A Love Built to Last
- Many Years, One Beautiful Love
- Family Begins With Love
- Your Story Inspires Us
- Love Grows Every Year
- Forever Together
- Celebrating Every Chapter
- Thank You for Showing Us Love
- Happy Anniversary to Our Favorite Couple
For a milestone anniversary, make the number the focal point.
For example:
50
YEARS OF LOVE
1976 – 2026
This type of design is simple but highly personal.
Happy Anniversary Stencil Design Ideas for 2026
For current anniversary projects, simple and personalized designs are a strong choice.
Instead of filling the stencil with many decorations, focus on clean lettering and personal details.
Try these design directions:
- Minimalist typography
- Large anniversary numbers
- Names with a small heart
- Wedding date below the main text
- Simple floral line art
- Rustic wood lettering
- Modern black-and-white designs
- Elegant script with bold supporting text
- Circular anniversary layouts
- Monogram designs
- Initials inside a heart
- Simple infinity symbols
- Photo backdrop lettering
- Neutral home decor styles
- Personalized milestone signs
A useful design trend is personalization.
Instead of only writing Happy Anniversary, create:
HAPPY ANNIVERSARY
LUCAS & OLIVIA
10 YEARS
The extra information makes the stencil feel made for one couple.
How to Choose the Best Happy Anniversary Stencil
Before printing or cutting a design, ask yourself a few questions.
Where will I use it?
A card needs a different size than a wall sign.
Will I cut it by hand?
If yes, choose a simple design with thick letters.
Will I use Cricut?
If yes, an SVG design can make the cutting process easier.
Do I need it more than once?
If yes, choose a reusable stencil material.
Who is receiving it?
A romantic design suits a spouse. A family-themed design may be better for parents or grandparents.
Does the design have enough empty space?
Crowded designs can be difficult to read.
Are the letters connected correctly?
Check enclosed letters such as A, O, P, R, and B.
The best stencil is not necessarily the most detailed one.
A clean design with good spacing often looks more professional.
20 Ready-to-Use Happy Anniversary Stencil Layouts
If you are unsure how to arrange your design, these layouts can help.
- HAPPY ANNIVERSARY + two hearts
- HAPPY ANNIVERSARY + names
- 25 YEARS + small heart
- FOREVER & ALWAYS + date
- JOHN ♥ EMMA + anniversary year
- OUR LOVE STORY + wedding date
- STILL IN LOVE + floral border
- TOGETHER SINCE 2006
- BETTER TOGETHER + linked hearts
- 50 YEARS OF LOVE
- HAPPILY EVER AFTER + wedding rings
- LOVE GROWS HERE + flowers
- FOREVER US inside a heart
- CHEERS TO US + anniversary number
- OUR FOREVER + names
- ONE LOVE, ONE LIFE + date
- STILL CHOOSING YOU
- TOGETHER IS HOME
- LOVE NEVER FADES
- ANOTHER BEAUTIFUL YEAR TOGETHER
These layouts can be printed, cut by hand, or adapted for a cutting machine.
Common Happy Anniversary Stencil Mistakes
Even a simple stencil can go wrong if the design is not prepared correctly.
Using a very thin font
Thin letters can break during cutting or painting.
Better: Use bold or stencil-friendly lettering.
Using too much paint
Excess paint can move under the stencil.
Better: Use a small amount and build the color slowly.
Forgetting stencil bridges
Some letters have enclosed spaces.
Better: Make sure inner sections remain connected.
Skipping the test
A design may look good digitally but fail on the actual surface.
Better: Test it first.
Ignoring surface texture
Rough wood can produce uneven edges.
Better: Sand the surface when appropriate.
Making the design too large
A large message may overpower a small sign.
Better: Measure before cutting.
Using too many decorative elements
Hearts, flowers, stars, names, dates, and quotes can make one design crowded.
Better: Choose one main element and a few supporting details.
FAQs
What is the best font for a happy anniversary stencil?
A bold font with clear letter shapes is usually best. If you want a script style, choose a thicker script font designed for cutting or stenciling.
Can I make a happy anniversary stencil with Cricut?
Yes. Cricut can cut many stencil designs. SVG files are especially useful because they can be resized and prepared for cutting.
What is the best material for a reusable anniversary stencil?
Mylar and other dedicated stencil materials are good choices for reusable projects. They can generally be cleaned and used again when handled properly.
Can I print a happy anniversary stencil at home?
Yes. A PDF or suitable image can be printed at home. Use thicker paper or cardstock if you plan to cut the stencil by hand.
Should I use SVG or PNG for Cricut?
SVG is generally the better choice for cutting-machine projects because it contains vector paths. A PNG is an image and may require additional preparation before cutting.
How do I stop paint from bleeding under my stencil?
Secure the stencil, use very little paint, and dab instead of brushing heavily. Testing your technique on scrap material can also help.
Can I put names and dates on an anniversary stencil?
Absolutely. Adding the couple’s names, wedding date, or anniversary number is one of the easiest ways to personalize the design.
What size should a happy anniversary stencil be?
The ideal size depends on the project. Small cards may need only a few inches of lettering, while large signs and photo backdrops may need designs measuring several feet.
Can I make a stencil without a Cricut?
Yes. You can print a design and cut it by hand using paper, cardstock, or suitable stencil material. A craft knife can help with detailed designs, but always use appropriate cutting precautions.
What surfaces can I use an anniversary stencil on?
You can use suitable stencils on materials such as wood, paper, cardstock, canvas, fabric, and some smooth surfaces. Always choose paint and stencil material that are compatible with the surface.
Conclusion
A happy anniversary stencil is a simple tool with many creative uses. You can turn one design into a wooden sign, greeting card, gift decoration, photo backdrop, or personalized keepsake.
For quick projects, a printable PDF can be enough. For Cricut and Silhouette projects, an SVG design can give you more control. If you want a reusable stencil, choose a durable stencil material such as Mylar.
Keep your lettering clear, use the right size, and avoid designs that are too complicated. Most importantly, personalize the stencil with names, dates, or anniversary numbers.
Whether you are celebrating one year or fifty years, a thoughtful stencil can make the occasion feel even more special.