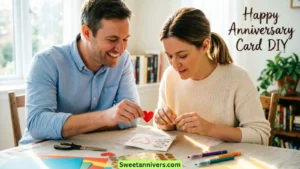
You want to say I love you on your anniversary. But sometimes, store-bought cards feel cold. They don’t show real effort.
That’s why a happy anniversary card diy is the best choice. It’s personal. It’s cheap. And it shows you care.
When you make a card by hand, you put your time and heart into it. No machine can copy that. Whether you’ve been together for one year or fifty years, a handmade card wins every time.
In this post, you will find over 280 ideas. We will cover romantic, funny, short, Instagram-worthy, and trending styles. Grab your scissors, glue, and let’s get started.
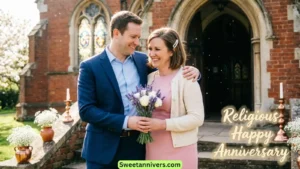
Romantic Happy Anniversary Card DIY for Your Soulmate
A romantic card makes your partner cry happy tears. Use soft colors, love quotes, and personal touches. Below are romantic DIY ideas to melt their heart.
- Press a real flower from your first date. Glue it inside the card.
- Write a love letter on the back of a photo of you two.
- Use a wax seal with your initial. It looks old-school and elegant.
- Cut the card into a heart shape – not a rectangle.
- Glue dried lavender to make the card smell amazing.
- Write 100 reasons I love you in tiny handwriting.
- Use watercolor paint to make a sunset background.
- Trace both your hands holding each other. Cut it out.
- Add a small mirror inside with the text You’re still my favorite view.
- Stitch a simple heart with red thread on thick paper.
- Fold a map card – mark the place you first met.
- Use glitter glue to write Still falling for you.
- Print a QR code that links to your wedding song on YouTube.
- Add a tiny photo booth strip of your best selfies.
- Write a haiku about your first kiss.
- Layer tissue paper to make a soft, textured heart.
- Use a coffee-stained paper for a vintage feel.
- Cut a window into the front – show a hidden love note inside.
- Add a small charm (like a tiny key or heart) with ribbon.
- Write Every day with you feels like… and finish on the inside.
- Glue on soft velvet fabric for the cover.
- Use a calligraphy pen for their name.
- Make a pop-up I love you that jumps when they open it.
💡 Pro tip: Use thick cardstock so your happy anniversary card diy feels expensive.
Funny Happy Anniversary Card DIY to Make Them Laugh
Not every couple is super serious. If you love to joke around, go funny. A laugh is a great gift. These funny DIY card ideas will crack a smile.
- Draw a potato with the text I’d still pick you.
- Write You’re like software updates – Always annoying but necessary.
- Glue a candy wrapper inside: Thanks for not returning me.
- Make a fart cloud with cotton balls and brown paper.
- Write We still have chemistry – glue a tiny beaker drawing.
- Add a small maze with Find the way to my heart (still the same path).
- Write I love you more than coffee – then cross out coffee and write sleep.
- Draw two skeletons hugging – Even when we’re bones.
- Write You’re my favorite pain in the neck.
- Write Happy anniversary to the one who hasn’t left… yet.
- Glue a noodle – We always stick together like wet pasta.
- Make a pop-up white flag – I surrender. You win. Again.
- Write Thanks for not hiding my cookies.
- Draw a couch potato with a crown – King/Queen of chilling with me.
- Write You + me = less laundry duty for both.
- Glue a small Band-Aid – For all the silly fights.
- Write I like you even when you snore.
- Draw a half-eaten cake – We saved you some love.
- Add a tiny envelope labeled Emergency puns inside: I love you a waffle lot.
- Write Our love is like a fart – If you force it, it’s probably crap.
- Make a coupon: Good for one argument – you win automatically.
😂 Remember: Funny works best if your partner has a good sense of humor. Keep it kind, not mean.
Short & Cute Happy Anniversary Card DIY
Short on time? No problem. These cute and fast DIY cards take less than 10 minutes. They still look adorable.
- Fold a piece of brown paper bag – write Love you, bag much?
- Cut a small tag from cereal box – tie with string.
- Write You. Me. Still us. on a sticky note. Stick inside a folded paper.
- Use a gum wrapper as an envelope – tiny love note inside.
- Glue a tea bag tag – You steep my heart.
- Write Same team. Same dream. Add two stick figures.
- Cut a heart from an old calendar page – glue on blank card.
- Use a rubber stamp that says Approved for another year.
- Write I’d swipe right again. on a mini card.
- Fold a dollar bill into a heart – tape inside.
- Write You’re my favorite notification.
- Use a hole punch to make a constellation of dots (your star sign).
- Glue a small bandage – You make it all better.
- Write Still crushing on you hard.
- Cut a small cloud from felt – You make my day sunny.
- Write No returns. No exchanges.
- Glue a single Lucky Charm marshmallow – You’re my lucky one.
- Write Thanks for putting up with my weird.
- Use a paper clip shaped like a heart – attach to a small note.
- Write You + me = my favorite thing.
- Fold a receipt – write Best purchase ever: us.
- Use washi tape to make stripes or zigzags.
- Write I love you more than pizza. (Only say this if true!)
- Glue a tiny key – You unlocked my heart.
- Write Same love. New card.
⏱️ Time saver: Keep blank cards and basic supplies ready. Then a happy anniversary card diy is always 5 minutes away.
Best Happy Anniversary Card DIY for Instagram Photos
You’ll want to show off your work. These Instagram-worthy DIY cards look great on camera. Bright colors, unique shapes, and clever designs.
- Use a polaroid frame – put your photo inside a handmade border.
- Create a confetti pocket – when they open, confetti falls (film this!).
- Make a mini accordion book with 5 small memories.
- Use ombre paint – fade from light pink to deep red.
- Add dried orange slices – very trendy and pretty.
- Use embroidery hoop as frame – card is stretched inside.
- Write with white pen on black paper – high contrast.
- Add pressed fern leaves – elegant and green.
- Use a kraft paper base with white gel pen doodles.
- Cut a card shaped like a camera – Capturing every year with you.
- Add a small tassel on the spine.
- Use marble contact paper as the cover.
- Write with neon markers – glows under black light.
- Add a small paper flower bouquet glued to front.
- Use a wax seal with a ribbon wrap – looks expensive.
- Make a date night ticket inside – tear-off stub.
- Use a transparent vellum overlay – mysterious and dreamy.
- Add a tiny envelope with seeds – Let our love grow.
- Write on a wood slice – then attach to card base.
- Use a paint splatter background – fun and messy.
- Cut a heart out of sandpaper – rough but sweet.
- Add a small compass – You are my true north.
- Use a rainbow of thread to stitch a line across.
- Glue on a real mini clock face – Time flies with you.
- Use a photo corner sticker – highlight a special picture.
📸 Photo tip: Take your photo in natural daylight. Use a clean white or wood background. Hashtag #handmadeanniversarycard.
Trending Happy Anniversary Card DIY This Year
What’s hot right now? These trending ideas come from Pinterest, TikTok, and craft blogs. Stay current with these styles.
- Pop-up bouquet card – flowers jump out when opened.
- Pocket letter – fold a letter into small pockets with tiny gifts (stickers, tea, washi).
- Shadow box card – deep frame with layers of paper.
- Retro 90s style – neon colors, zigzags, and tiny CD shape.
- Minimalist line art – one single continuous line drawing of your faces.
- Eco-friendly card – made from seed paper (plant after reading).
- Hidden message with lemon juice – read by heating (spy style).
- Foil quill card – shiny metallic lines (use a foil pen).
- Interactive wheel card – spin to see different love messages.
- Origami heart inside a glassine envelope.
- Monogram card – big letter in center with floral drawings.
- Ribbon pull tab – pull a ribbon to reveal I love you.
- Bubble wrap card – pop bubbles while reading.
- Scratch-off card – make your own with dish soap + acrylic paint.
- Card inside a card inside a card – matryoshka style.
- Faux leather card – made from craft foam and painted.
- ASCII art card – create a heart using keyboard symbols typed out.
- Cake slice card – shaped like a triangle.
- Message in a bottle – tiny scroll inside a small glass vial glued to card.
- Perpetual flip calendar card – change the year every year.
- Mosaic card – from torn magazine pieces.
- Resin charm card – small resin heart glued on.
- Emoji-only card – draw or use stickers: ❤️🎂🥂😘
- 3D paper cut layers – use an X-Acto knife for depth.
- Junk journal style – mix receipts, tickets, stamps, and lace.
🔥 Trend alert: Interactive cards (pull tabs, pop-ups, wheels) get the most likes on social media.
Happy Anniversary Card DIY Using Only Household Items
No craft store? No problem. You already have what you need at home. These zero-cost DIY cards use common items.
- Cereal box cardboard – cut and cover with white paper.
- Newspaper comic strips – glue as colorful background.
- Old greeting card – cut out the front and glue onto new paper.
- Coffee filter – dye with coffee, dry, then write on it.
- Fabric scrap from old t-shirt – glue as soft cover.
- Toilet paper tube – flatten, cut into heart shapes, stamp with paint.
- Egg carton – cut out one cup, paint as a 3D flower.
- Paper grocery bag – crumple, smooth out, write with marker.
- Bottle caps – glue as tiny wheels or eyes on a drawn car.
- Cotton balls – make a cloud or sheep.
- Pasta shells – glue as bow ties or hearts.
- Old map or atlas pages – use as envelope liner.
- Used stamps – create a collage on front.
- Tin foil – crinkle, flatten, glue as shiny accent.
- Q-tips – cut and glue as fence or matchsticks.
- Playing card – use as the cover (Ace of Hearts is perfect).
- Old calendar photos – cut into small shapes.
- Puzzle piece – glue one piece with You complete me.
- Paper doily – from kitchen baking section.
- Twist ties – shape into heart and glue.
- Magazine letters – cut out to spell LOVE ransom style.
- Yarn or thread scraps – make a tiny tassel.
- Cinnamon stick – glue on for scent and rustic look.
- Plastic lid from milk jug – trace a perfect circle for a sun.
- Used tea bag – dry it, open it, use the paper for a vintage look.
♻️ Eco bonus: Every happy anniversary card diy from recycled items saves money and the planet.
Step-by-Step Happy Anniversary Card DIY for Beginners
Never made a card before? Follow this simple step-by-step guide. You will make a beautiful card in 20 minutes.
1: Gather supplies
- One sheet of paper (printer paper is fine)
- Scissors
- Glue stick or tape
- Any coloring tool (pen, marker, crayon)
- Optional: photo, ribbon, sticker
2: Fold paper in half
- Fold it like a book. Press the crease hard.
3: Draw a heart on the front
- Fold heart shape by folding paper, cutting half a heart, then unfolding.
4: Write Happy Anniversary
- Use big letters. Trace twice for bold look.
5: Inside, write a short message
- Example: So glad I married you. Love, [Your name]
6: Add one decoration
- Glue a small photo or draw a flower.
7: Sign your name
- Add the date. Year 1, 2, 3, etc.
8: Let dry if using wet glue
- Wait 5 minutes.
9: Put in an envelope
- Or fold a second paper around it.
10: Give it with a hug
- Hand deliver or hide on their pillow.
🎨 Beginner tip: Don’t overthink. A simple happy anniversary card diy with honest words beats any store card.
What to Write Inside Your Happy Anniversary Card DIY
The outside looks great. Now fill the inside with heartfelt words. Here are 25 messages you can copy or change.
- Every year with you is my favorite year.
- I’d choose you again and again.
- You still give me butterflies.
- Home is wherever you are.
- We’ve grown so much together. I love who we’ve become.
- You make ordinary days feel special.
- I love our story. Can’t wait for the next chapter.
- Still the best decision I ever made.
- You are my peace and my party.
- Together is my favorite place to be.
- Thanks for still holding my hand.
- You make my world better just by being in it.
- I love the life we built.
- You are my greatest adventure.
- Thanks for seeing the best in me.
- Every day I wake up grateful for you.
- I love you more than all the stars.
- We’re a team. Always.
- You are my favorite person to do nothing with.
- Thanks for growing old with me… slowly.
- I’d do it all over again in a heartbeat.
- You are my sunshine on cloudy days.
- Happy anniversary, my love. Here’s to many more.
✍️ Pro tip: Write a draft on scratch paper first. Then copy it into your happy anniversary card diy cleanly.
Conclusion
A handmade card costs little money but means everything. You don’t need to be an artist. You just need to care. Whether you choose romantic, funny, short, or trending – your partner will feel the love.
Now pick one idea from this list. Gather your supplies. Set a timer for 20 minutes. Make something real.
👉 Question for you: Which DIY idea will you try first? Tell us in the comments below. And if you make one, share a photo – we’d love to see it.
Happy crafting, and happy anniversary! 🎁💌