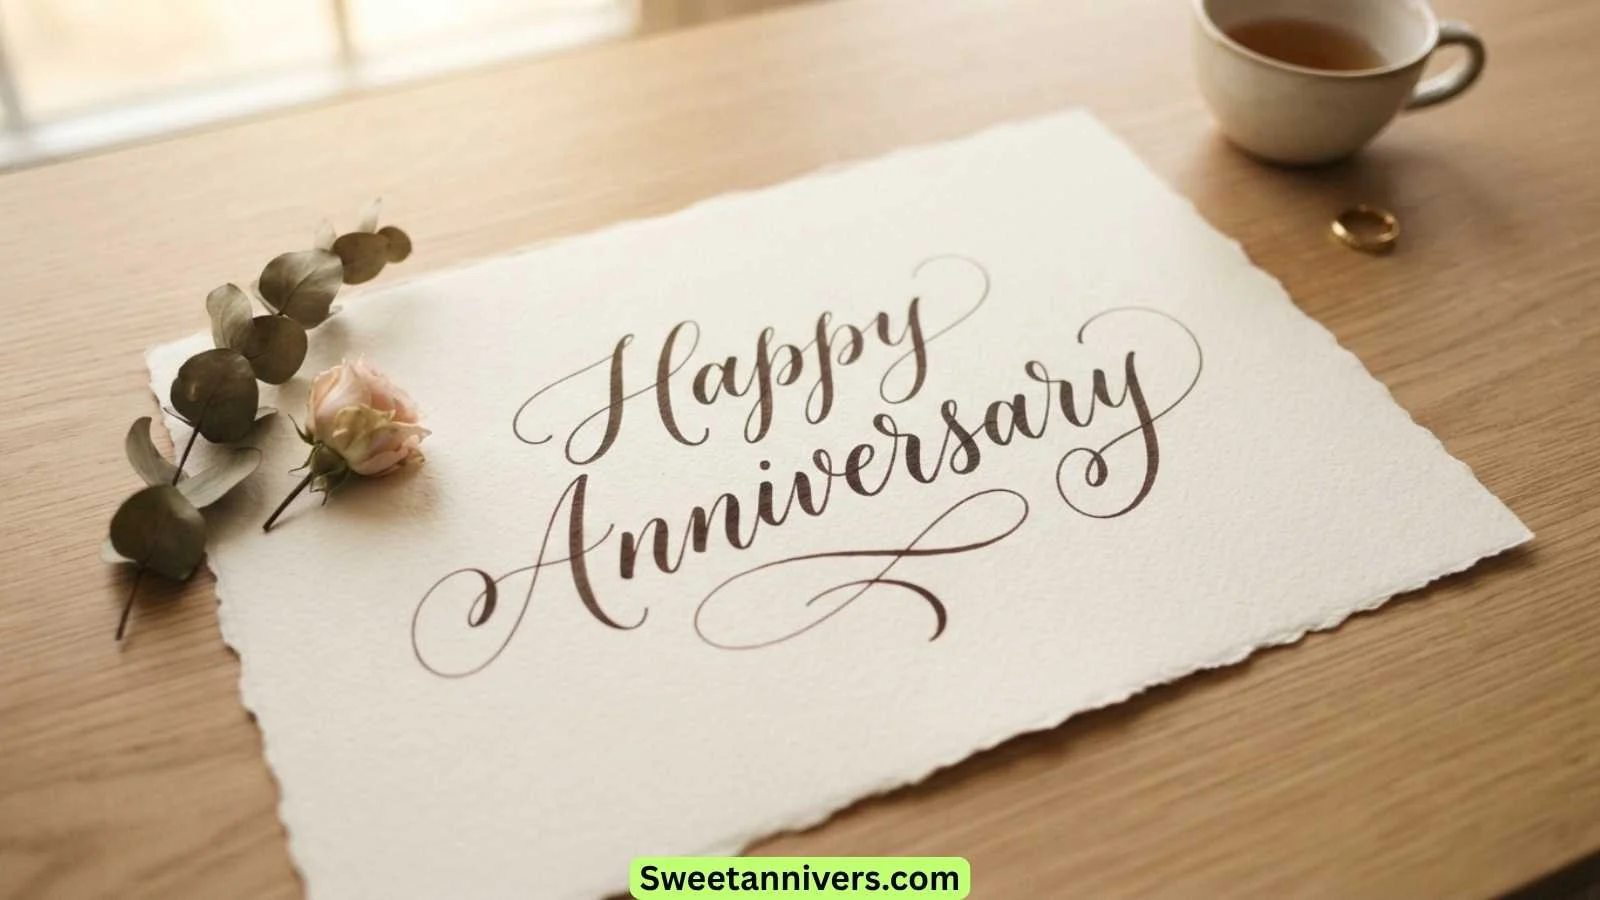
A simple Happy Anniversary can become a beautiful keepsake when written in calligraphy. Elegant letters, soft curves, and creative flourishes can turn a short greeting into something worth framing.
Calligraphy Happy Anniversary designs are popular for cards, wedding photos, gifts, invitations, wall art, scrapbooks, and social media posts.
You can choose a romantic script, modern brush lettering, simple handwritten style, or classic decorative design.
The good news is that you do not need to be an expert calligrapher. Beginners can create attractive anniversary lettering with a pencil, brush pen, or even a digital design tool.
In this guide, you will find 30+ Happy Anniversary calligraphy examples, different lettering styles, romantic ideas, beginner tips, card designs, Instagram ideas, useful materials, and common mistakes to avoid.
Quick Answer: What Is Happy Anniversary Calligraphy?
Happy Anniversary calligraphy means writing the words “Happy Anniversary” using decorative and artistic lettering. The letters may include flowing strokes, thick and thin lines, flourishes, loops, or simple handwritten details.
You can create anniversary calligraphy with:
- A brush pen
- A pointed calligraphy pen
- A regular fine-tip marker
- A pencil
- A digital drawing app
- A calligraphy-style font
The best style depends on your project.
For a romantic card, flowing script works well. For an Instagram post, bold brush lettering may be easier to read. And for a formal anniversary gift, elegant lettering with simple decorations can create a timeless look.
Happy Anniversary Calligraphy Styles
There is no single correct way to write an anniversary greeting. Different calligraphy styles create different feelings.
Here are some popular options to consider.
1. Modern Calligraphy
Modern calligraphy has relaxed letters and creative shapes. It does not need to follow strict traditional rules.
Best for: Cards, gifts, prints, and social media.
Example:
Happy Anniversary
Add a small heart or simple flourish to the final letter.
2. Brush Lettering
Brush lettering uses thick and thin strokes. The result can look bold, smooth, and artistic.
Best for: Instagram graphics, posters, cards, and digital designs.
3. Elegant Script
Elegant script uses flowing letters with graceful curves.
Best for: Romantic cards, wedding anniversaries, framed artwork, and formal gifts.
4. Minimalist Lettering
Minimalist lettering keeps the design clean. There are fewer flourishes and decorations.
Best for: Modern couples, simple cards, and home décor.
5. Floral Calligraphy
Floral calligraphy combines lettering with flowers, leaves, vines, or small botanical details.
Best for: Wedding anniversaries, handmade cards, and feminine designs.
6. Vintage Calligraphy
Vintage lettering can have old-fashioned curves and decorative details.
Best for: Classic anniversary cards, nostalgic gifts, and traditional designs.
7. Bold Hand Lettering
Bold lettering makes the words easy to see from a distance.
Best for: Posters, banners, cake toppers, and social media graphics.
30 Beautiful Happy Anniversary Calligraphy Examples
Sometimes the best way to choose a style is to see different wording ideas first.
Here are 30 short and practical phrases you can use in your own design.
- Happy Anniversary, My Love
- Happy Anniversary to My Forever
- Forever Starts With You
- Still Falling for You
- Forever Looks Beautiful With You
- Another Year of Love
- Cheers to Our Love Story
- Together Is My Favorite Place
- My Heart Still Chooses You
- Love You Today and Always
- Happy Anniversary, My One and Only
- Another Beautiful Chapter Together
- You Are My Forever
- Still in Love After All These Years
- Two Hearts, One Beautiful Journey
- Forever and Always
- Our Love Gets Better Every Year
- You Are My Happily Ever After
- Growing Old With You Is My Dream
- Love, Laughter, and Forever
- One Love, One Beautiful Life
- Forever With My Favorite Person
- Another Year of Beautiful Memories
- Together Through Every Season
- Our Forever Story
- Still Choosing You
- Love Grows Here
- Made for Each Other
- Cheers to Us
- Happy Anniversary to My Greatest Love
For a calligraphy design, keep the main phrase large.
If you use a longer message, make “Happy Anniversary” the focal point and place the rest underneath in a smaller, simpler font.
Romantic Happy Anniversary Calligraphy Ideas
Romantic lettering works especially well for partners and spouses.
Use flowing strokes, soft curves, and small heart details to create a warm look.
- Happy Anniversary, My Love
- You Are My Forever
- I Would Choose You Again
- My Heart Belongs to You
- Forever Is Better With You
- You Make My World Beautiful
- Every Year With You Is a Gift
- You Are Still My Favorite Person
- Our Love Is My Favorite Story
- I Love the Life We Built Together
- You Make Forever Feel Easy
- Thank You for Every Beautiful Memory
- You Are My Home and My Happiness
- Life Is Better With You
- My Favorite Place Is Beside You
- Every Day I Love You More
- You Have My Heart, Always
- Together Is Where I Belong
- Our Love Is Worth Celebrating
- Here Is to Forever With You
A romantic design does not need many decorations.
Try writing Happy Anniversary in large script lettering. Then place the couple’s names and anniversary date underneath.
For example:
Happy Anniversary
Emma & Daniel
August 22, 2018
This simple layout can work beautifully on a card or framed print.
Simple Happy Anniversary Calligraphy for Beginners
If you are new to calligraphy, do not start with complicated lettering.
Begin with basic strokes and simple words.
A beginner-friendly design could look like:
Happy Anniversary
Then add:
♡ Emma & Daniel ♡
You can practice with these simple steps:
- Draw light horizontal guidelines.
- Write each letter slowly.
- Keep the letters close in size.
- Use light pressure on upward strokes.
- Use more pressure on downward strokes.
- Keep your hand relaxed.
- Leave even spaces between words.
- Practice the capital H separately.
- Practice the capital A separately.
- Add flourishes only after finishing the words.
Do not worry if your first attempt looks uneven.
Calligraphy improves through repetition. Even five to ten minutes of practice each day can help you gain better control.
How to Write Happy Anniversary in Calligraphy
The basic technique is easier than it may look.
Start by writing the phrase with a pencil. Do not worry about making it perfect. Focus on the shape and spacing.
Next, trace over your letters with a brush pen or fine-tip marker.
For basic brush lettering, remember this rule:
Thin on the way up. Thick on the way down.
Use gentle pressure when moving the pen upward. Press slightly harder when moving downward.
After the ink dries, erase the pencil guidelines.
Finally, add small details such as:
- Hearts
- Leaves
- Flowers
- Stars
- Dots
- Curved flourishes
- Initials
- Wedding dates
Avoid adding too many decorations.
The lettering should remain the main focus.
Calligraphy Happy Anniversary for Cards
An anniversary card is one of the easiest places to use decorative lettering.
Put the main greeting on the front. Add a personal message inside.
Here are ideas for the front:
- Happy Anniversary, My Love
- Happy Anniversary to a Beautiful Couple
- Celebrating Our Love
- Another Year Together
- Forever Starts Here
- Cheers to Us
- Our Love Story Continues
- Love, Laughter, and Forever
- Another Chapter of Our Story
- Together Forever
- To Love and Forever
- Still Choosing You
- A Lifetime of Love
- Forever Looks Good on Us
- Our Best Chapter Yet
- Celebrating Another Year of Love
- Two Hearts, One Journey
- Love That Grows Stronger
- Together Through It All
- Happy Anniversary to My Favorite Person
For the card’s inside message, write something more personal.
For example:
Happy Anniversary, my love.
Every year with you gives me another reason to be grateful. Thank you for all the laughter, support, and memories we share.
This combination of decorative lettering and personal writing feels more meaningful than a generic greeting.
Happy Anniversary Calligraphy for Gifts
Calligraphy can make an ordinary gift feel personalized.
You can put anniversary lettering on the gift itself or use it on a small tag.
Try these ideas:
- Personalized anniversary mug
- Framed anniversary print
- Wooden anniversary sign
- Custom photo frame
- Handmade greeting card
- Personalized gift tag
- Anniversary scrapbook
- Custom couple poster
- Memory box
- Handwritten love letter
- Personalized bookmark
- Anniversary candle label
- Wedding date print
- Couple name artwork
- Anniversary wall art
- Handwritten envelope
- Custom anniversary banner
- Personalized keepsake
- Photo album cover
- Anniversary gift box
A particularly simple idea is to write the couple’s names and wedding date below Happy Anniversary.
That small detail makes the design feel unique.
Elegant Calligraphy Happy Anniversary Designs
Elegant designs usually work best when you avoid overcrowding.
Use one main lettering style and a simple color scheme.
Here are 20 design ideas:
- Black ink on white paper
- Gold-style lettering on cream paper
- White lettering on dark paper
- Floral border around the greeting
- Small leaves beside the words
- Initials underneath the greeting
- Wedding date below the names
- Large anniversary number
- Simple heart-shaped flourish
- Circular lettering design
- Calligraphy inside a thin frame
- Watercolor background
- Botanical corners
- Minimal black-and-white layout
- Large script with small supporting text
- Couple names in matching lettering
- Wedding photo with calligraphy overlay
- Vintage paper with classic script
- Simple monogram design
- Large “Forever” with anniversary details
Remember that white space is part of the design.
Leaving empty space around your lettering can make the words easier to read and give the finished piece a more professional appearance.
Happy Anniversary Calligraphy for Instagram
Social media designs need to be readable on a small screen.
Keep your main phrase short and use strong contrast between the lettering and background.
Try these captions or graphic phrases:
- Happy Anniversary, My Love ❤️
- Another Year of Us
- Forever Looks Good on Us
- Still Choosing You
- Our Forever Story
- Another Chapter Together
- Love Grows Here
- Together Is Everything
- Forever With My Favorite Person
- Love, Laughter, and Forever
- Another Year, Another Memory
- My Favorite Love Story
- Celebrating Us Today
- One More Year of Love
- Together Through Every Season
- Still My Person
- A Love Worth Celebrating
- Years Pass, Love Grows
- Forever Starts Again
For Instagram, avoid overly complicated script fonts.
If people cannot read the words quickly, they may scroll past your post.
A bold calligraphy phrase over a simple photo can often work better than a heavily decorated design.
Happy Anniversary Calligraphy for Different Relationships
The wording should match the person receiving your message.
For Your Husband
- Happy Anniversary to My Forever Love
- Another Year With My Best Friend
- I Would Choose You Every Time
- Forever Is Better With You
- Thank You for Being My Person
For Your Wife
- Happy Anniversary to My Beautiful Wife
- You Still Have My Whole Heart
- Every Year With You Is a Blessing
- You Make My Life Complete
- Forever With You Is My Dream
For Parents
- Happy Anniversary to the Best Parents
- Your Love Is an Inspiration
- Celebrating Your Beautiful Journey
- Wishing You Many More Happy Years
- Thank You for Showing Us True Love
For Friends
- Happy Anniversary to a Wonderful Couple
- Cheers to Another Year Together
- Your Love Story Is Beautiful
- Wishing You Both Endless Happiness
- Here Is to Many More Years
Matching the words to the relationship helps the design feel natural instead of generic.
Happy Anniversary Calligraphy for Milestone Anniversaries
Milestone anniversaries deserve extra attention.
A large anniversary number can become the centerpiece of your design.
Try these ideas:
- 1st Anniversary — Our First Beautiful Year
- 5th Anniversary — Five Years of Love
- 10th Anniversary — Ten Years Together
- 15th Anniversary — Fifteen Years of Memories
- 20th Anniversary — Two Decades of Love
- 25th Anniversary — Twenty-Five Years Together
- 30th Anniversary — Three Decades of Love
- 40th Anniversary — Forty Years of Memories
- 50th Anniversary — Fifty Years of Love
- 60th Anniversary — A Lifetime Together
For a milestone design, write the number in a large decorative style.
Place Happy Anniversary across or underneath it.
Then add the couple’s names and wedding date.
This creates a design that can work as a keepsake or wall decoration.
Funny Calligraphy Happy Anniversary Ideas
Not every anniversary message needs to be serious.
If the couple enjoys humor, use a playful phrase with bold hand lettering.
- Another Year of Not Annoying Each Other Too Much
- Still Married, Still Smiling
- Another Year of Sharing the Remote
- Love, Laughter, and Patience
- You Two Are Still Going Strong
- Another Year of “What Should We Eat?”
- Marriage: The Ultimate Team Sport
- Still Each Other’s Favorite Person
- Another Year of Sharing Snacks
- Congrats on Another Year Together
- Still Partners in Crime
- Another Year of Laughing at the Same Jokes
- Love Is Sharing Everything
- Another Year of Being Each Other’s Plus-One
- Still Together. Still Winning.
- Another Year of Teamwork
- Love Survives Everything, Even Group Chats
- You Still Like Each Other!
- Another Year of Happy Togetherness
- Keep Loving, Laughing, and Eating Together
Use a bold, playful lettering style for funny messages.
A tiny doodle can also add personality without making the design crowded.
Best Pens and Materials for Anniversary Calligraphy
You do not need expensive tools to begin.
A few simple supplies are enough.
| Tool | Best Use | Beginner Friendly? |
| Pencil | Sketching | Yes |
| Fine-tip marker | Simple lettering | Yes |
| Brush pen | Thick and thin strokes | Yes |
| Calligraphy pen | Traditional lettering | Medium |
| Smooth paper | Practice | Yes |
| Watercolor paper | Decorative designs | Yes |
| Ruler | Guidelines | Yes |
| Eraser | Removing pencil lines | Yes |
Smooth paper is especially useful for brush pens.
Rough paper can catch the tip of a brush pen and make your strokes look uneven.
For your first project, try a pencil, eraser, ruler, smooth paper, and brush pen. That is enough to create a simple anniversary card.
Common Calligraphy Mistakes to Avoid
Even a beautiful phrase can look messy if the lettering is difficult to read.
Watch out for these common problems:
- Making letters different sizes
- Using uneven spacing
- Pressing too hard on every stroke
- Making every letter overly decorative
- Adding too many flourishes
- Choosing a difficult-to-read style
- Crowding the page
- Using too many colors
- Forgetting the anniversary date
- Writing too quickly
- Skipping pencil guidelines
- Using rough paper with a brush pen
- Mixing too many lettering styles
- Making the main phrase too small
- Adding decorations before finishing the lettering
The most common beginner mistake is trying to make every letter fancy.
Instead, focus on clean shapes, consistent spacing, and readable words.
Simple calligraphy often looks more polished than complicated lettering.
Digital Happy Anniversary Calligraphy
You do not have to use pen and paper.
Digital calligraphy can be created with design software, drawing apps, tablets, or calligraphy-style fonts.
Digital designs are useful for:
- Instagram posts
- Facebook posts
- Digital invitations
- Anniversary videos
- Printable cards
- Photo overlays
- E-cards
- Phone wallpapers
- Digital scrapbooks
- Anniversary announcements
When choosing a digital font, look for one that is decorative but readable.
You can also combine a script font with a simple font.
For example:
Happy Anniversary
Emma & Daniel — 8 Years Together
The large script creates visual interest, while the simple text keeps the details easy to read.
How to Choose the Right Calligraphy Style
Not sure which style to use?
Start with the purpose of your design.
| Project | Recommended Style |
| Romantic card | Elegant script |
| Handmade card | Modern calligraphy |
| Instagram post | Bold brush lettering |
| Wedding photo | Elegant script |
| Wall art | Minimalist or floral |
| Gift tag | Simple handwritten style |
| Funny card | Bold hand lettering |
| Formal anniversary | Classic script |
| Milestone anniversary | Decorative number + script |
| Digital invitation | Modern script |
Think about the person as well.
A minimalist couple may prefer clean lettering. Someone who loves traditional designs may prefer flowing script and floral details.
The best style is the one that matches both the occasion and the person.
Simple Calligraphy Layouts You Can Copy
You can use these basic layouts for your next project.
Layout 1: Classic
Happy Anniversary
Emma & Daniel
August 22, 2018
Layout 2: Romantic
Happy Anniversary
♡ My Love ♡
Layout 3: Minimalist
Happy
Anniversary
8 Years Together
Layout 4: Floral
🌿 Happy Anniversary 🌿
Forever & Always
Layout 5: Milestone
25
Happy Anniversary
Emma & Daniel
These layouts are simple enough for beginners while still giving you room to add your own creative details.
FAQs
How do you write Happy Anniversary in calligraphy?
Start by lightly writing the phrase with a pencil. Then trace it with a brush pen or calligraphy pen, using lighter pressure on upward strokes and heavier pressure on downward strokes.
What is the easiest calligraphy style for beginners?
Modern calligraphy and simple brush lettering are good starting points. They allow more freedom than traditional styles and are easier to practice.
What pen is best for Happy Anniversary calligraphy?
A beginner-friendly brush pen or fine-tip marker is a good choice. A brush pen lets you create the thick and thin strokes often associated with modern calligraphy.
Can I create Happy Anniversary calligraphy digitally?
Yes. You can use drawing apps, design software, or calligraphy-style fonts. Digital lettering is especially useful for social media posts, e-cards, invitations, and printable designs.
How can I make anniversary calligraphy look elegant?
Keep the design simple. Use consistent spacing, one main lettering style, plenty of white space, and a few small decorations such as leaves or hearts.
Should I add the couple’s names?
Yes. Adding the couple’s names and anniversary date can make the design feel much more personal.
Is calligraphy difficult to learn?
Basic calligraphy is not difficult to start. It takes practice to make the lettering consistent, but simple anniversary designs can be created by beginners.
What should I write under Happy Anniversary?
You can add the couple’s names, wedding date, number of years together, or a short personal message. Keep the supporting text smaller than the main greeting.
Final Tips for Beautiful Calligraphy Happy Anniversary Designs
Before finishing your project, check these simple points:
- Keep the words readable
- Use consistent letter sizes
- Leave enough white space
- Choose one main lettering style
- Practice before using the final paper
- Add personal details
- Use decorations carefully
- Match the style to the recipient
- Choose the right pen
- Keep your message heartfelt
Remember that perfect lettering is not the main goal.
The personal effort behind the design is what makes an anniversary message special.
A handwritten Happy Anniversary created with care can mean much more than a generic printed greeting.
Conclusion
Calligraphy Happy Anniversary designs offer a simple and beautiful way to celebrate love. You can use elegant script for a romantic card, bold lettering for Instagram, floral designs for wedding keepsakes, or simple handwriting for a handmade gift.
You do not need professional skills to begin. Start with basic strokes, practice your letters, and keep your first design simple. Adding names, dates, hearts, flowers, or a meaningful message can make the final piece even more personal.
Most importantly, choose a style that matches the person and the occasion. Whether your design is simple or detailed, thoughtful lettering can turn Happy Anniversary into a memorable keepsake.